Jamf Migration
This describes how to migrate from Jamf’s instance to UT’s Jamf instance for MacOS only.
Attention
If at any point a step fails and you receive an error, please email RT with the error and the UT tag number of the device.
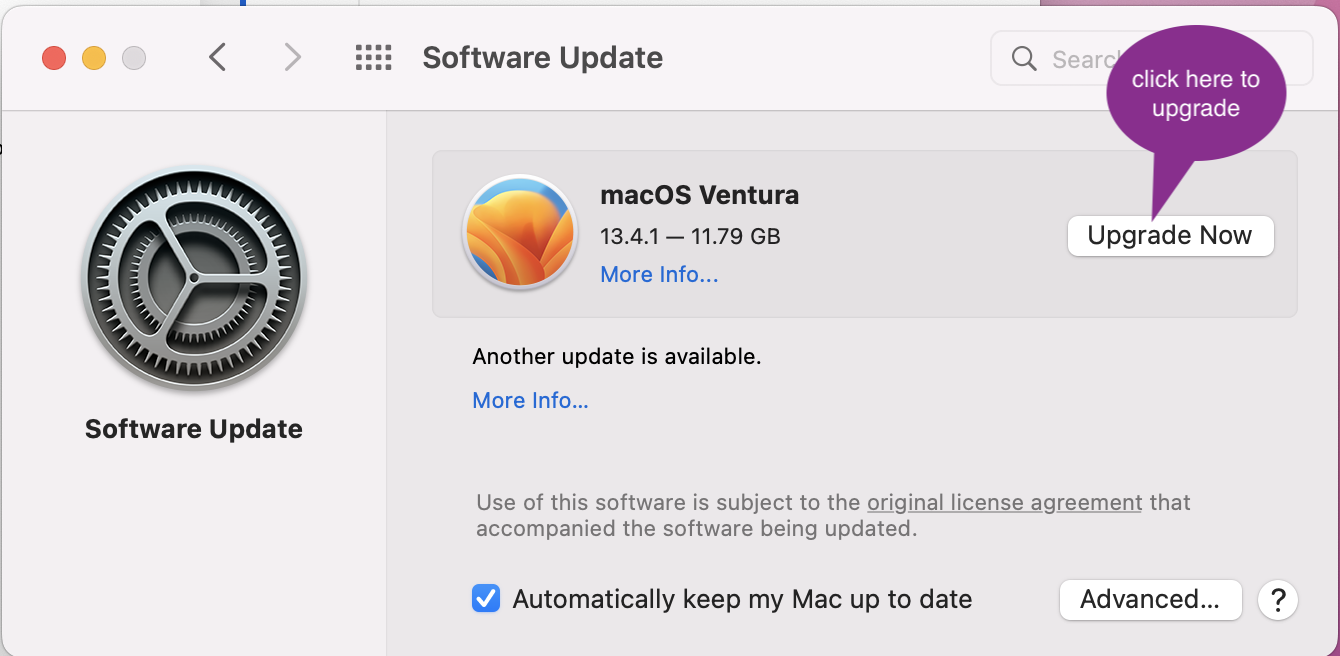
Upgrade to latest MacOS
For each computer in your possession, upgrade your OS to the latest version, currently this is Ventura. Go to . Please be aware the upgrade process could take up to an hour to complete.
Open the Oden Self Service app
Note
If you see the UT Self Service app, the laptop has already been migrated and you can skip this guide.

After a successful upgrade, open the Oden Self Service application located in the Applications folder. If you see the screen shot below, click on Open System Preferences as shown. Otherwise, move on to the next step, Migrate to Campus Jamf.
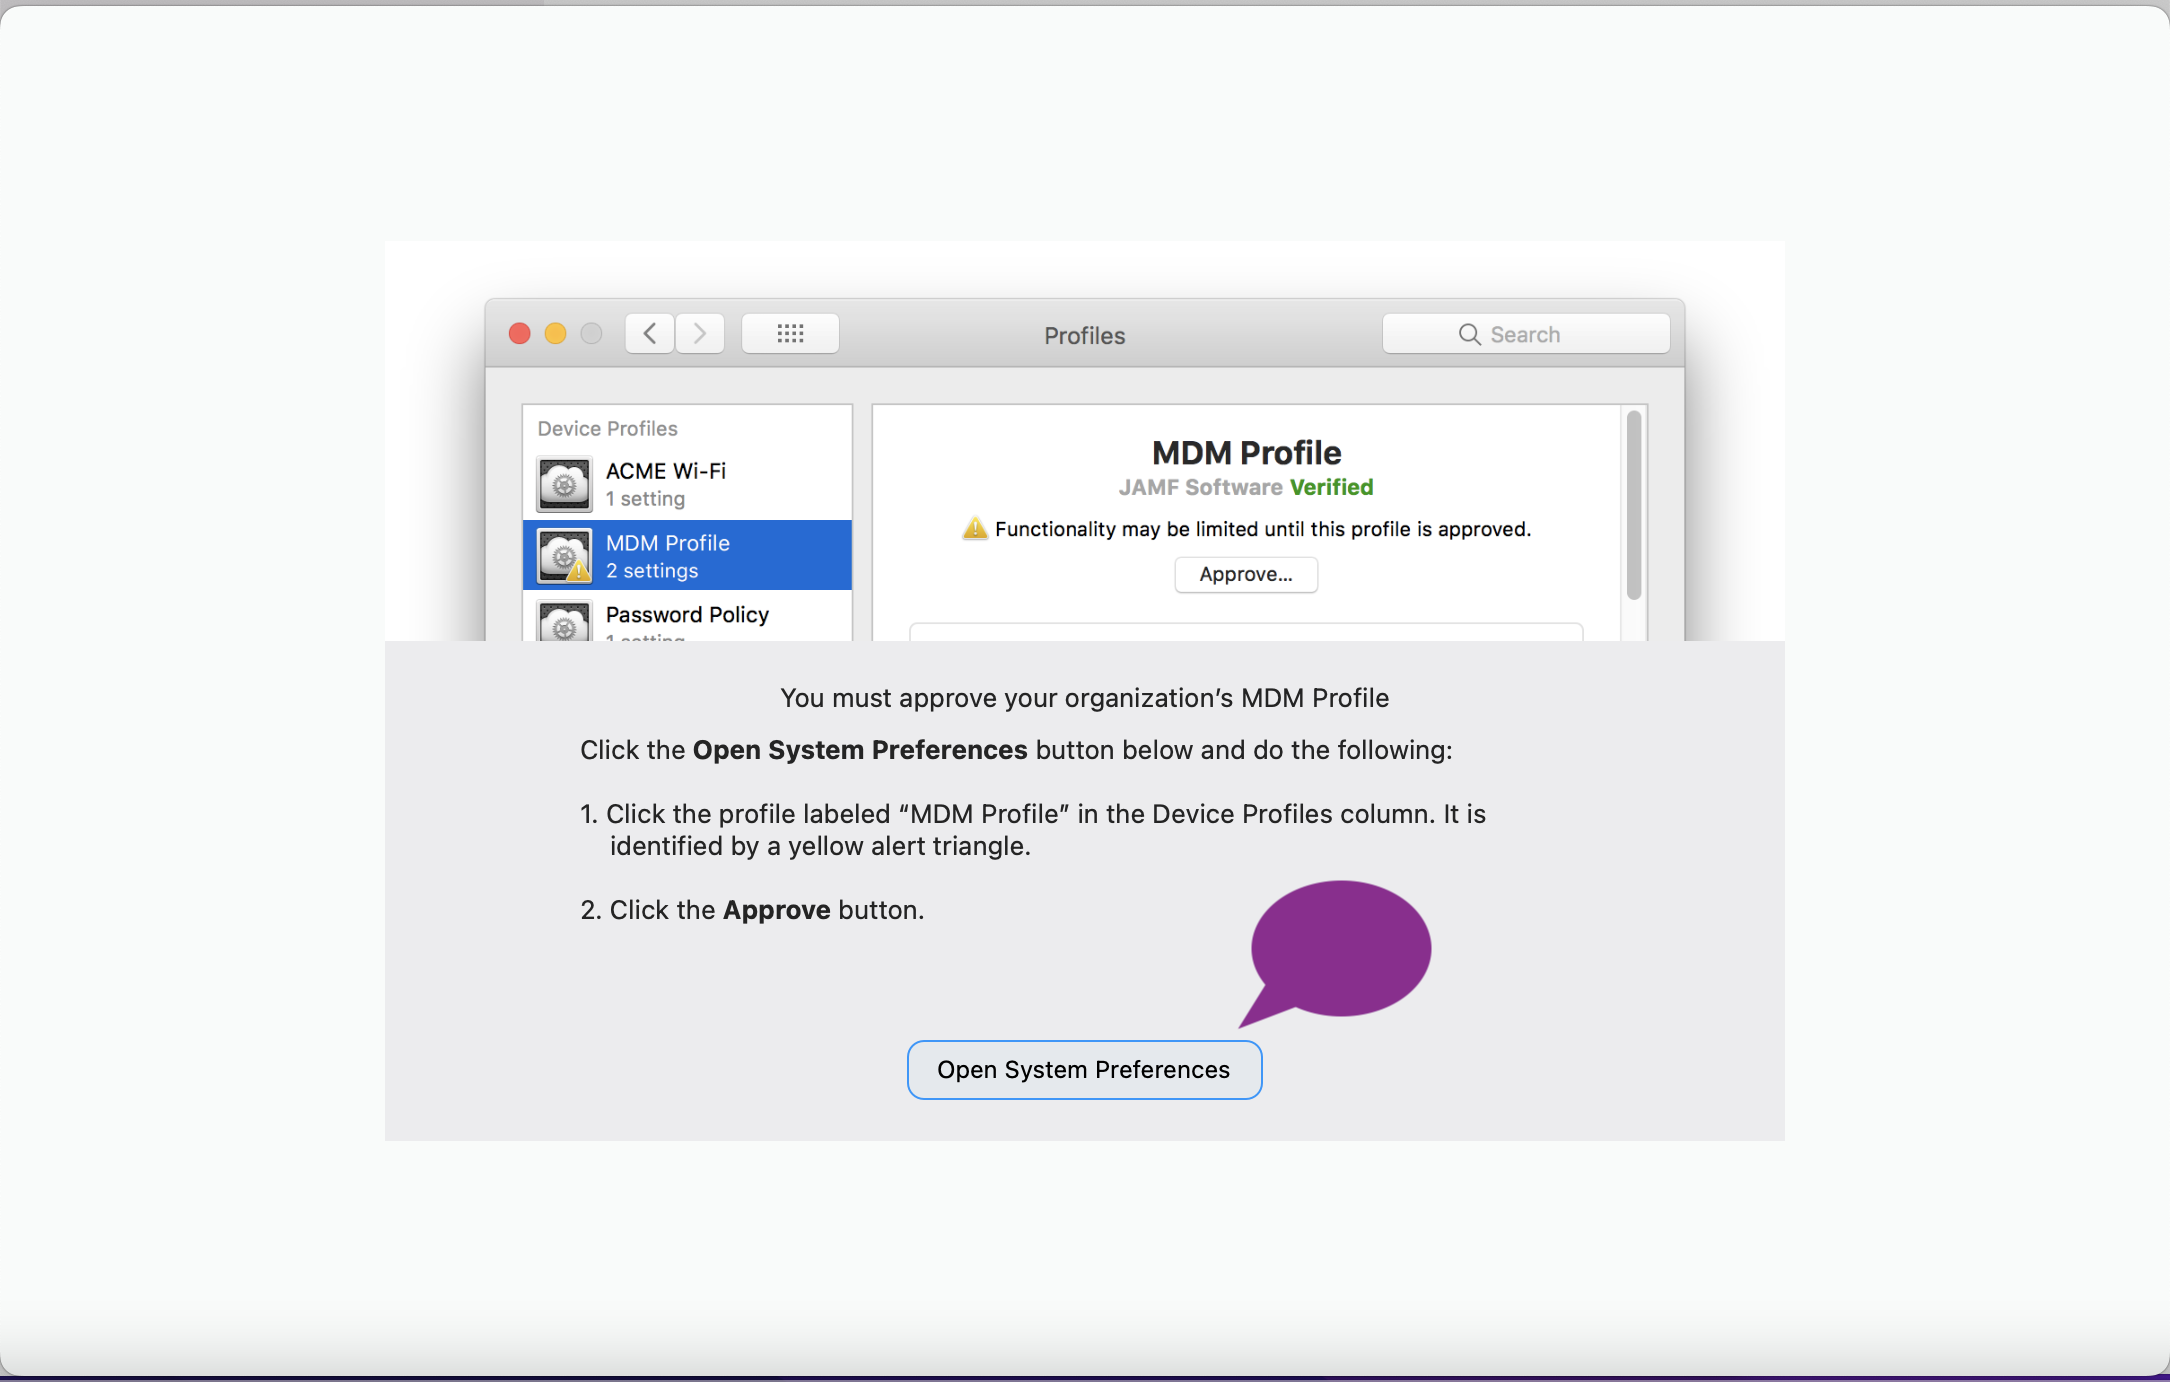
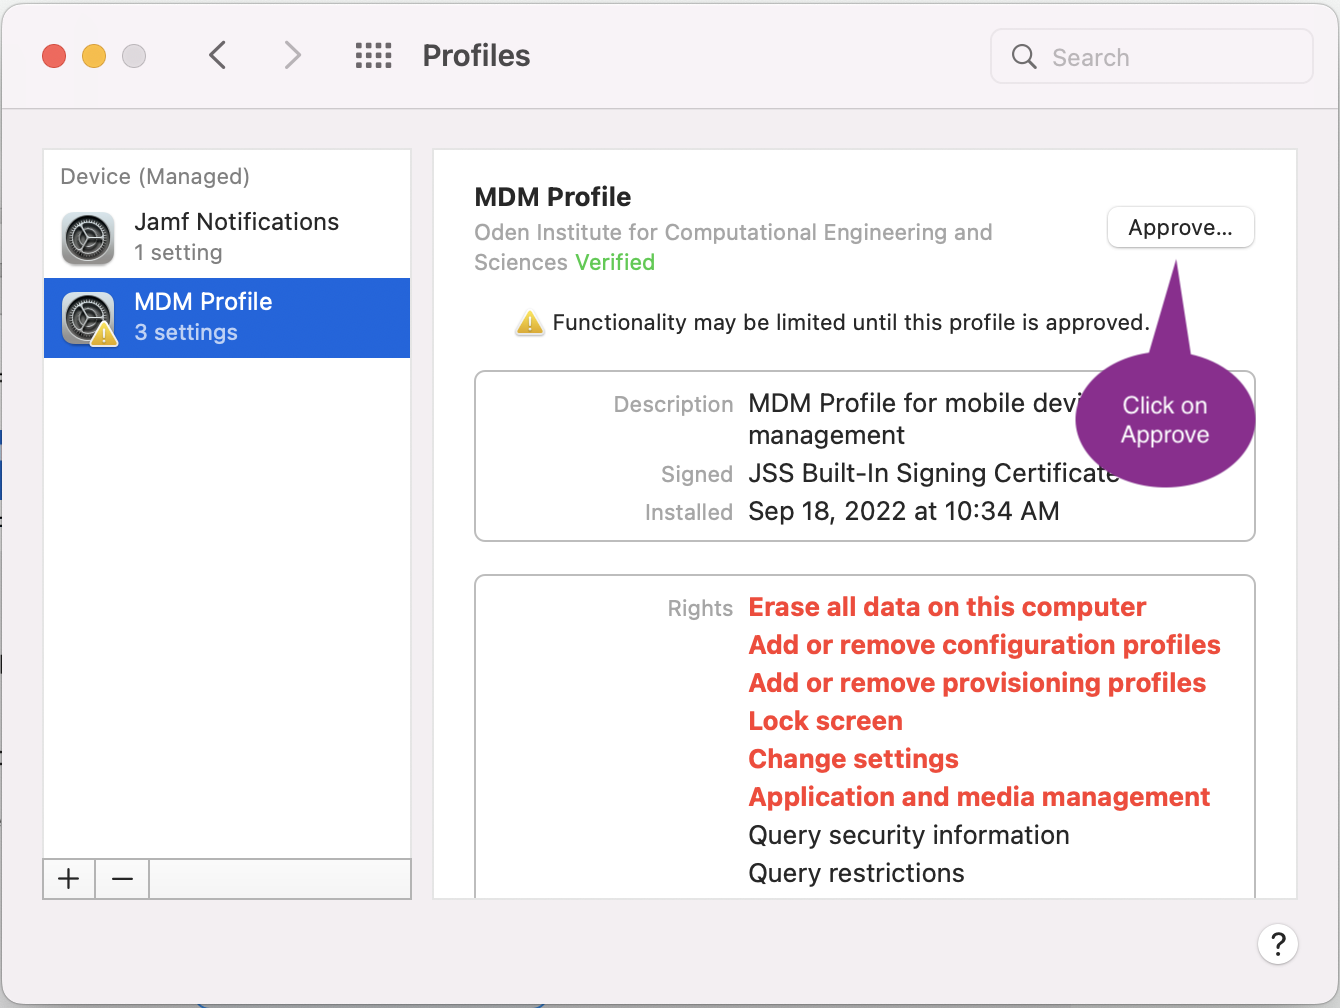
Approve the MDM profile
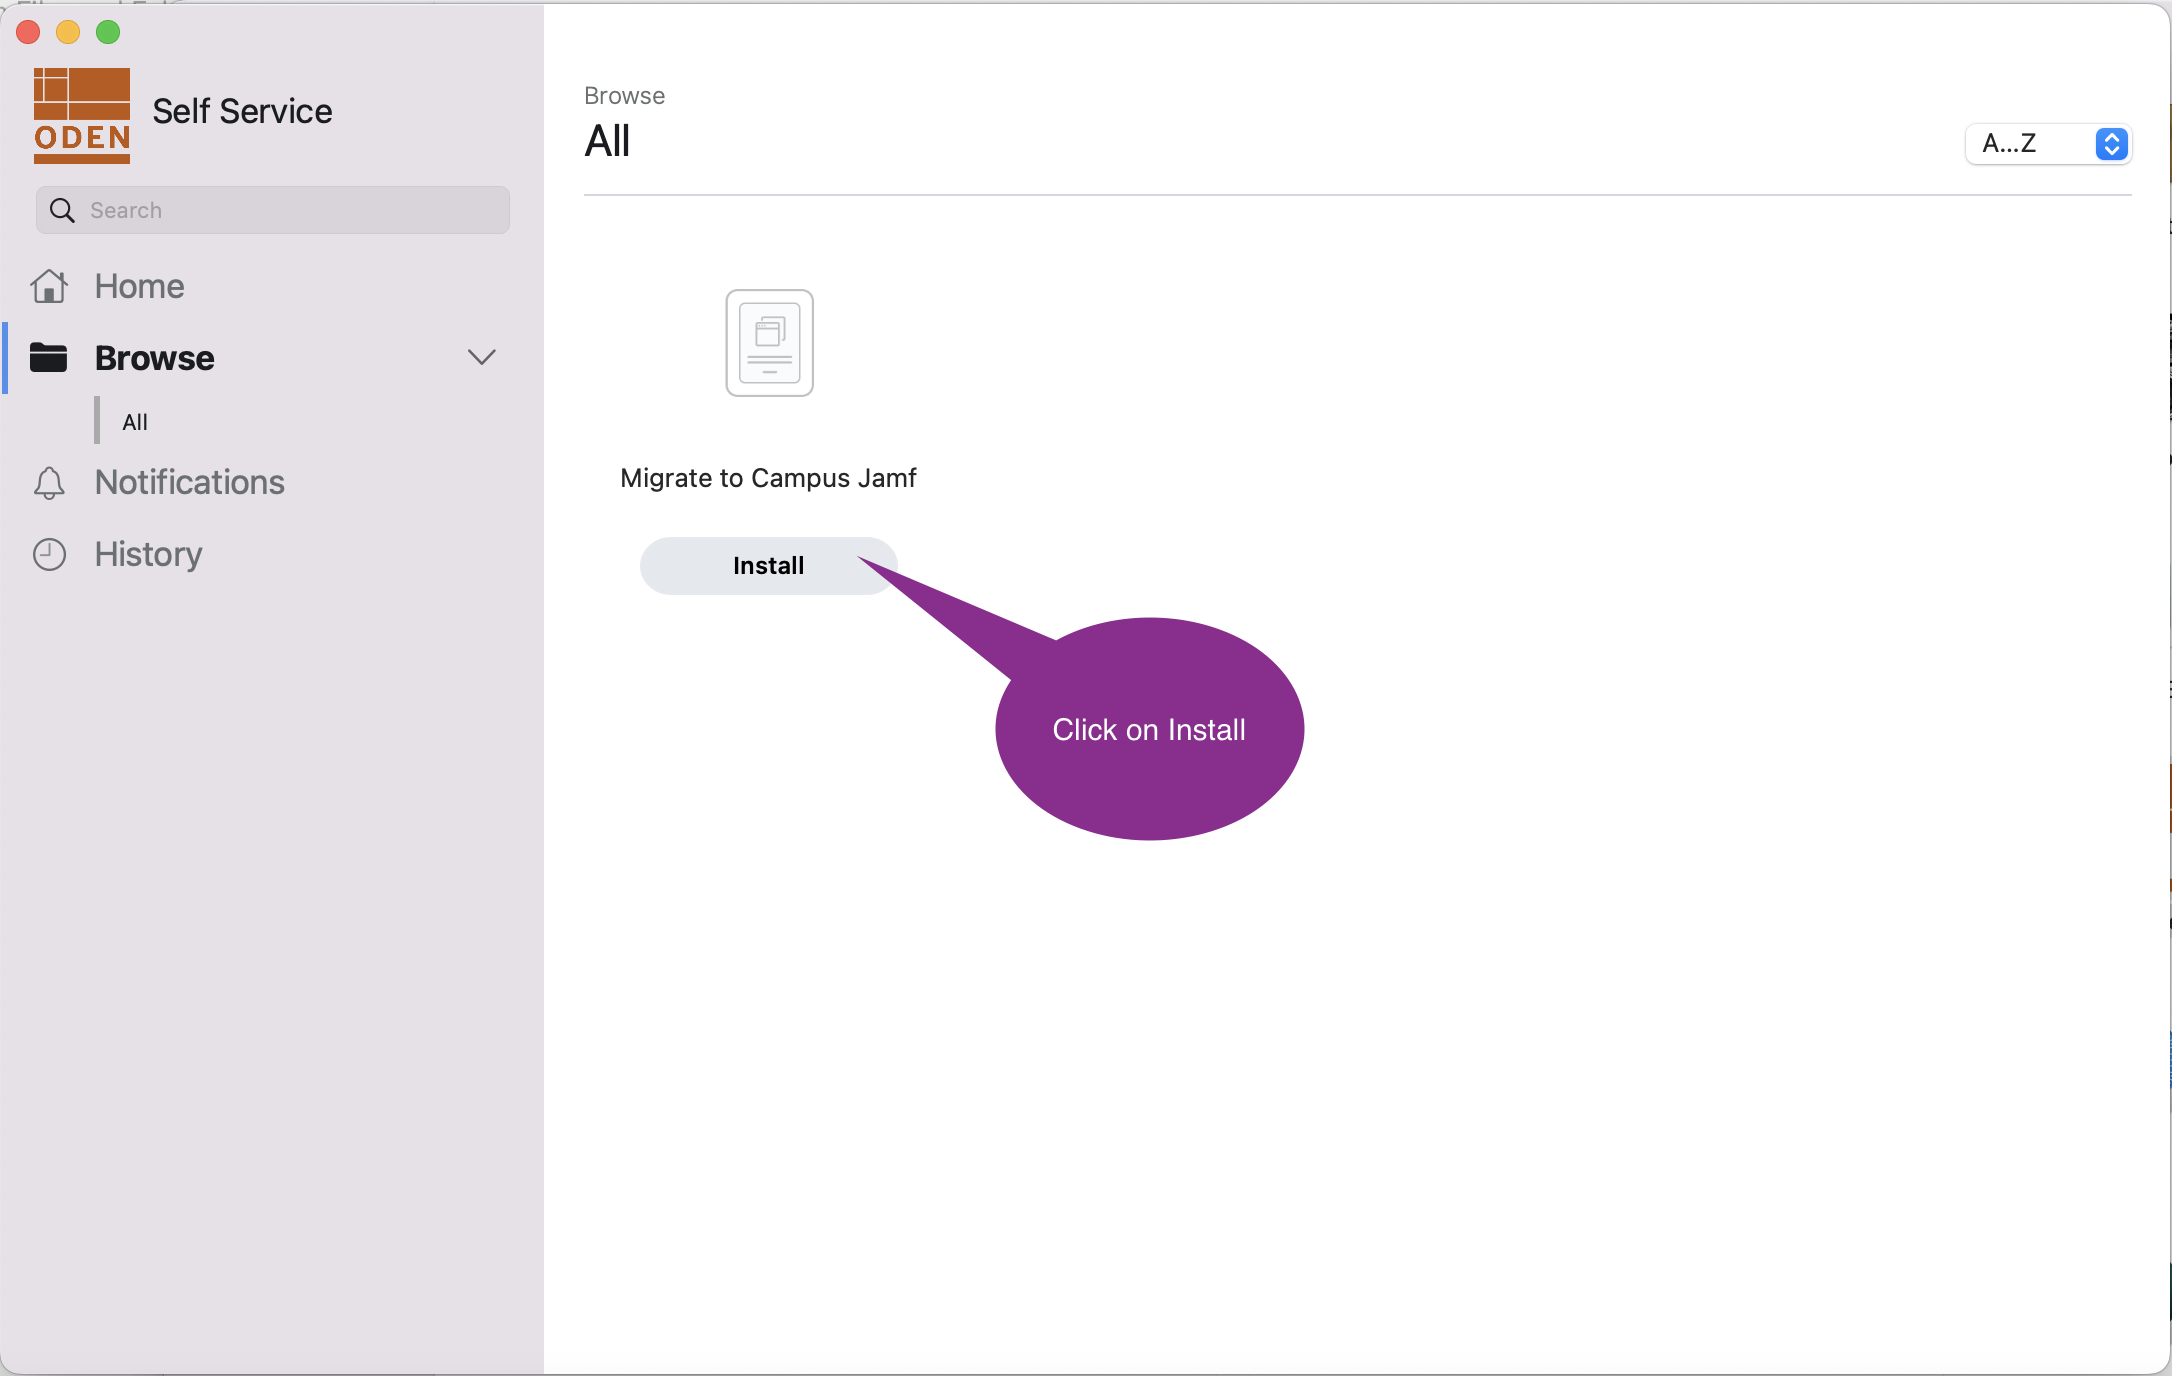
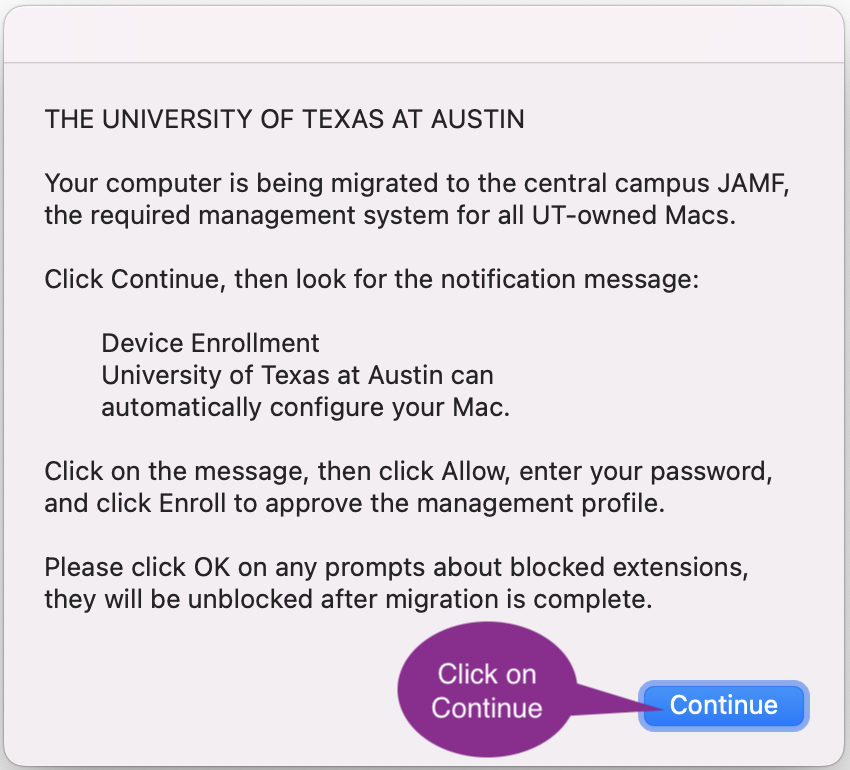
Migrate to Campus Jamf
Close the Profiles window from the last step and move back to the
Oden Self Service app. Click on the Install button under the
Migrate to Campus Jamf.
The window below could take up to a minute to appear. Once the
window opens, click on Continue to proceed.
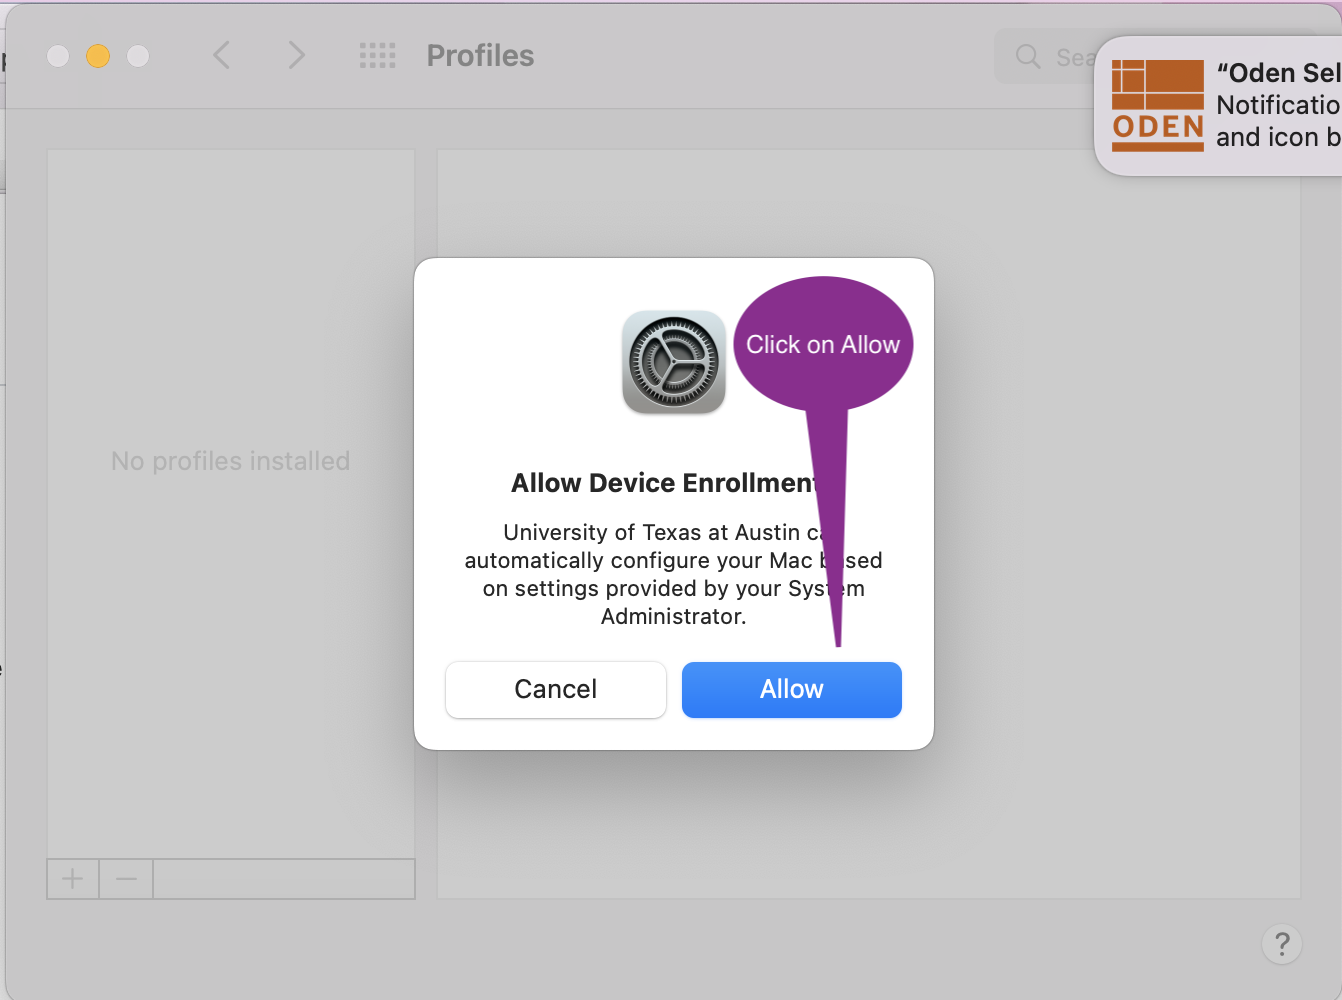
Device Enrollment
At the top right just below the Menu bar, a notification will appear.
Click on the Device Enrollment notification.

A window will appear after clicking on the notification from the last
step. Click on Allow to authorize device enrollment.
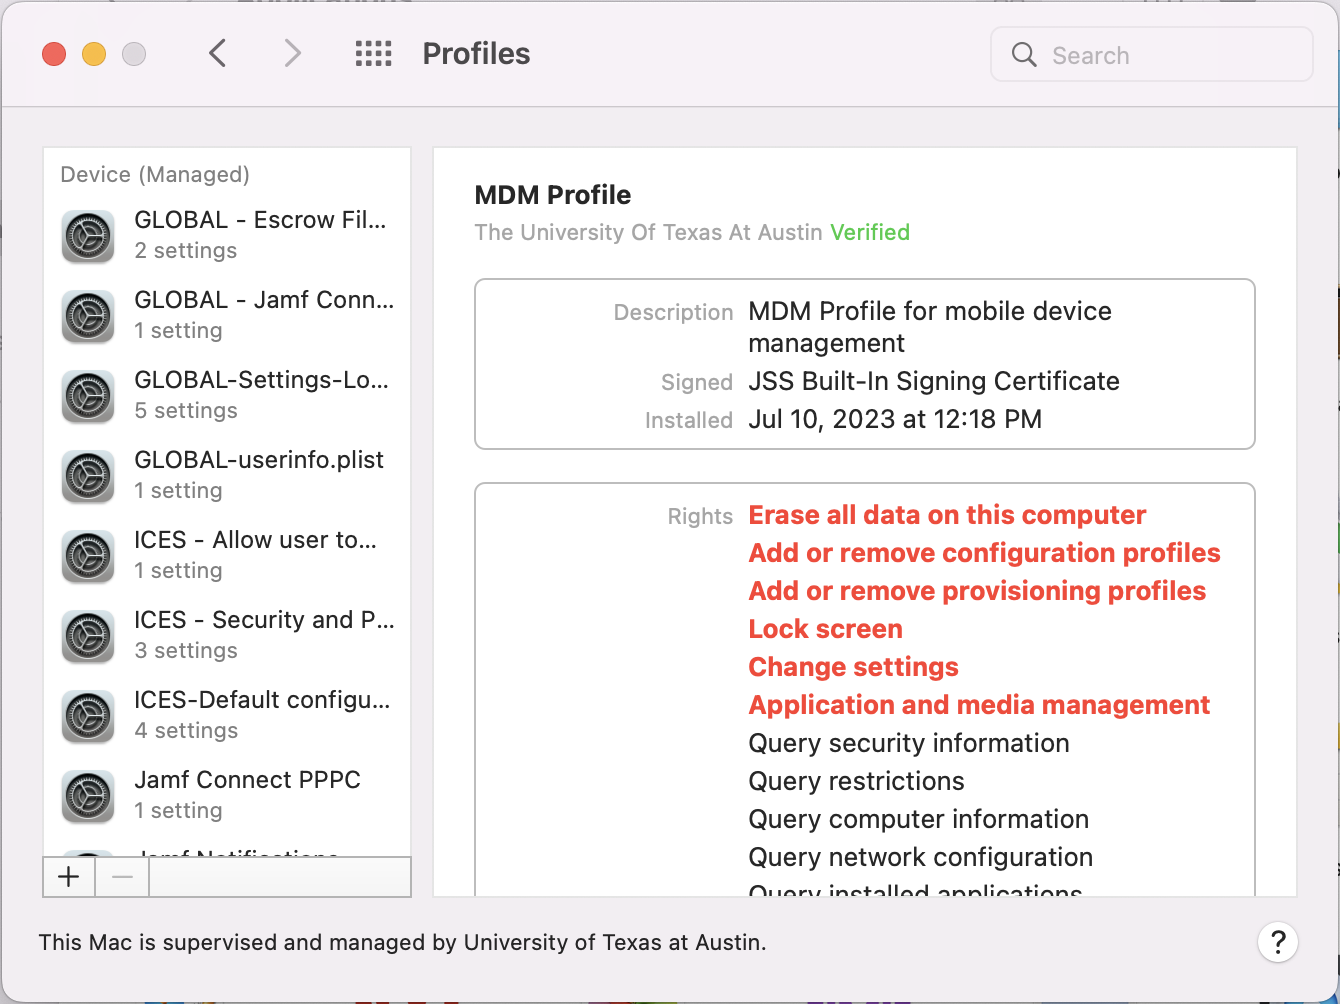
Once you see the Profiles window similar to below, you can close this
window.
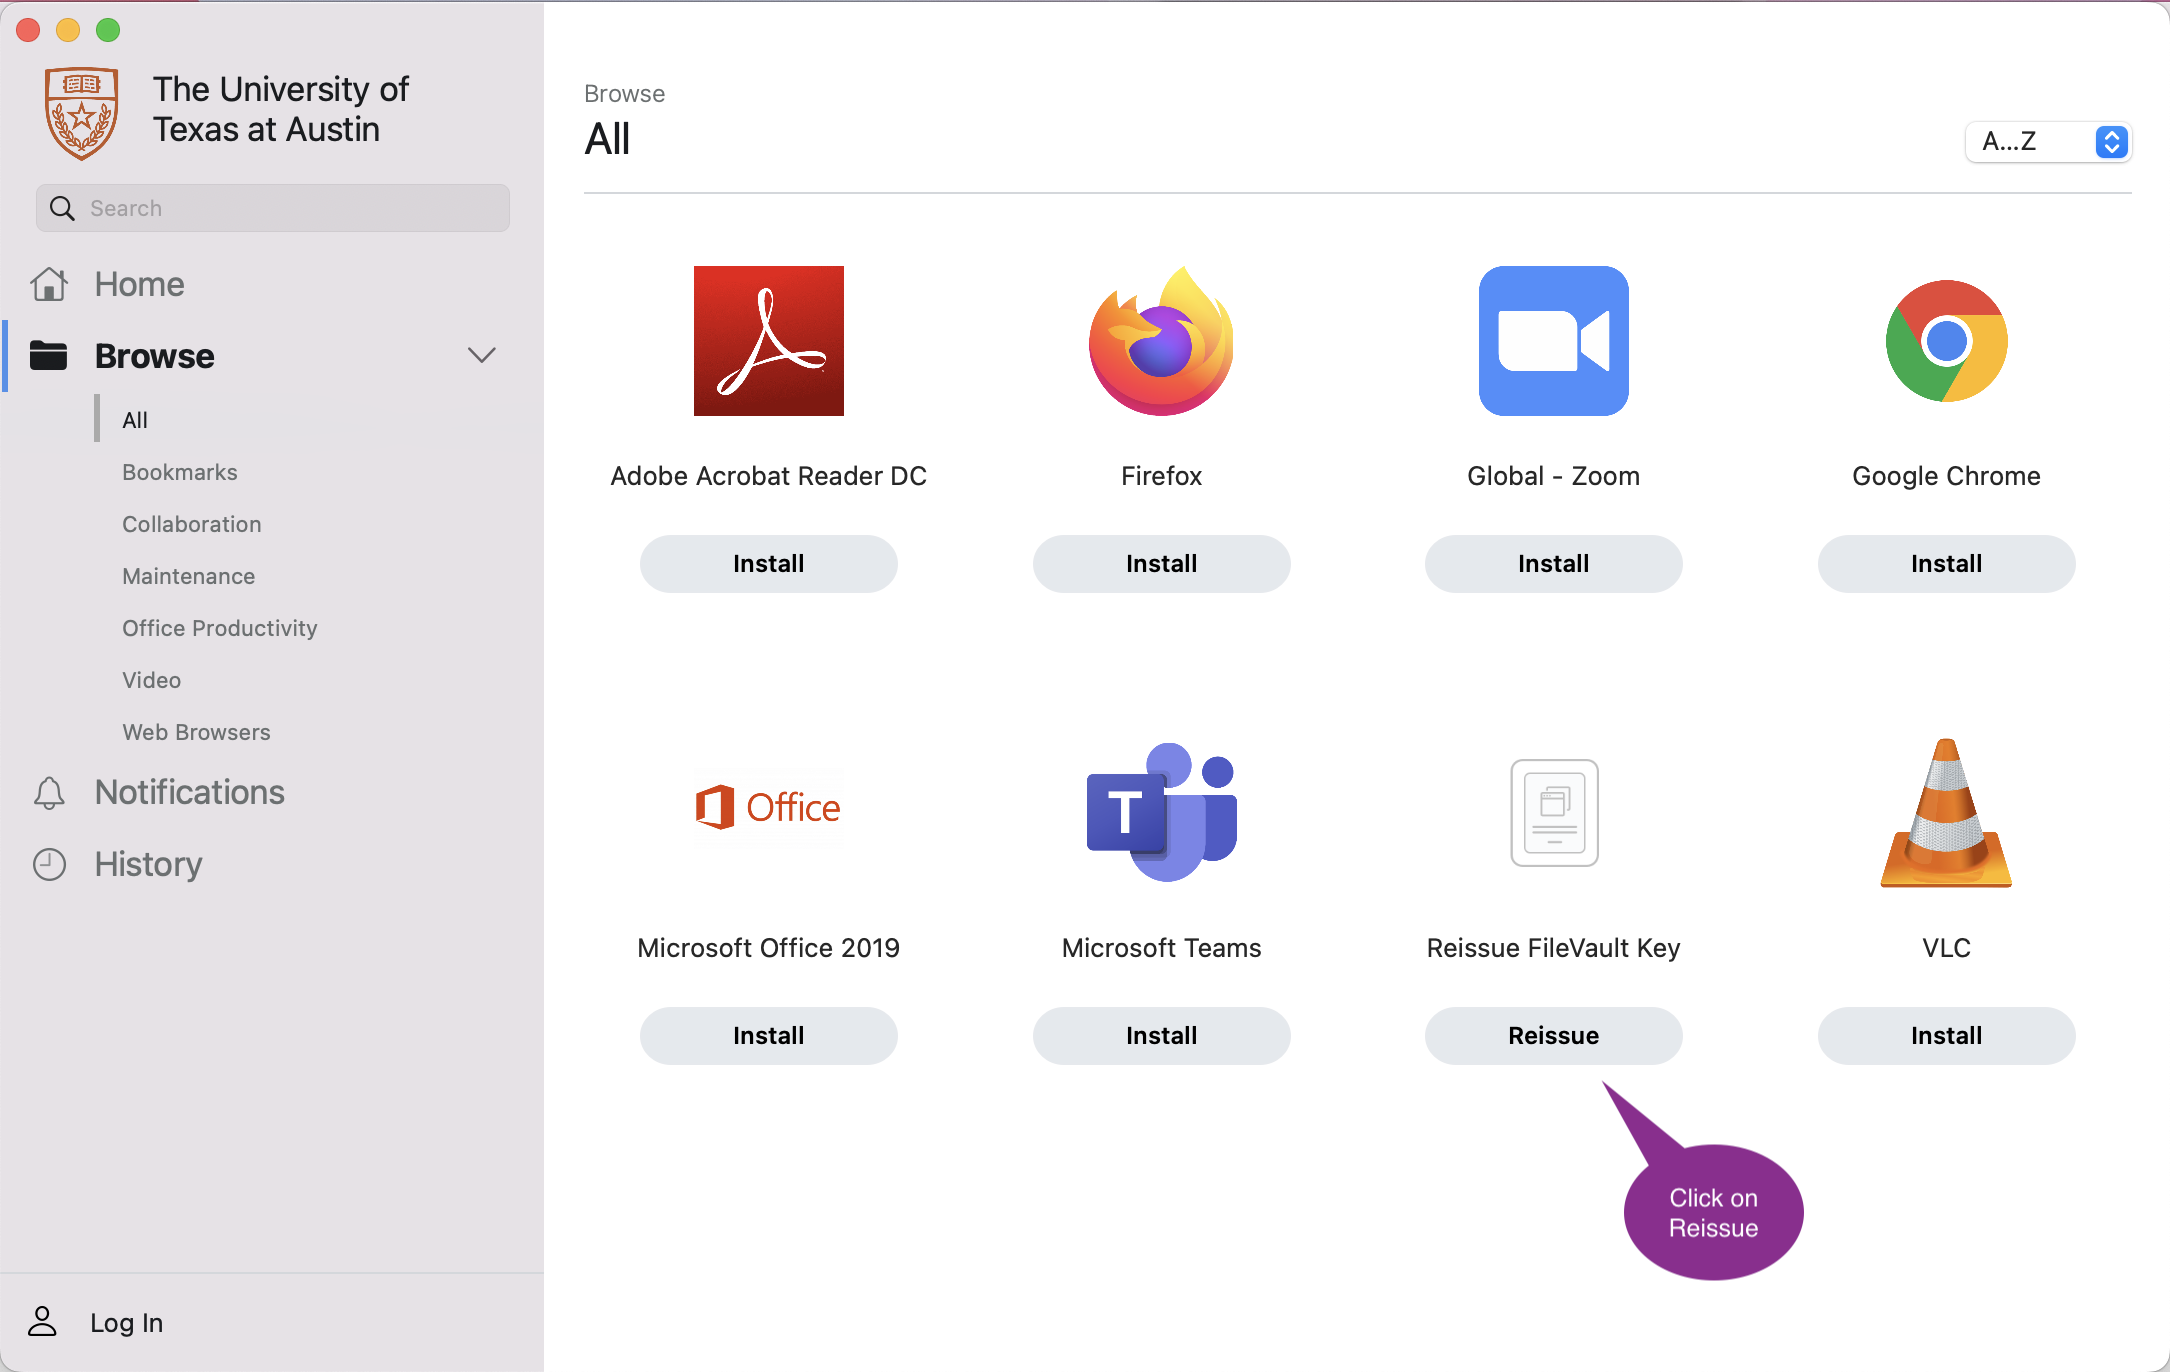
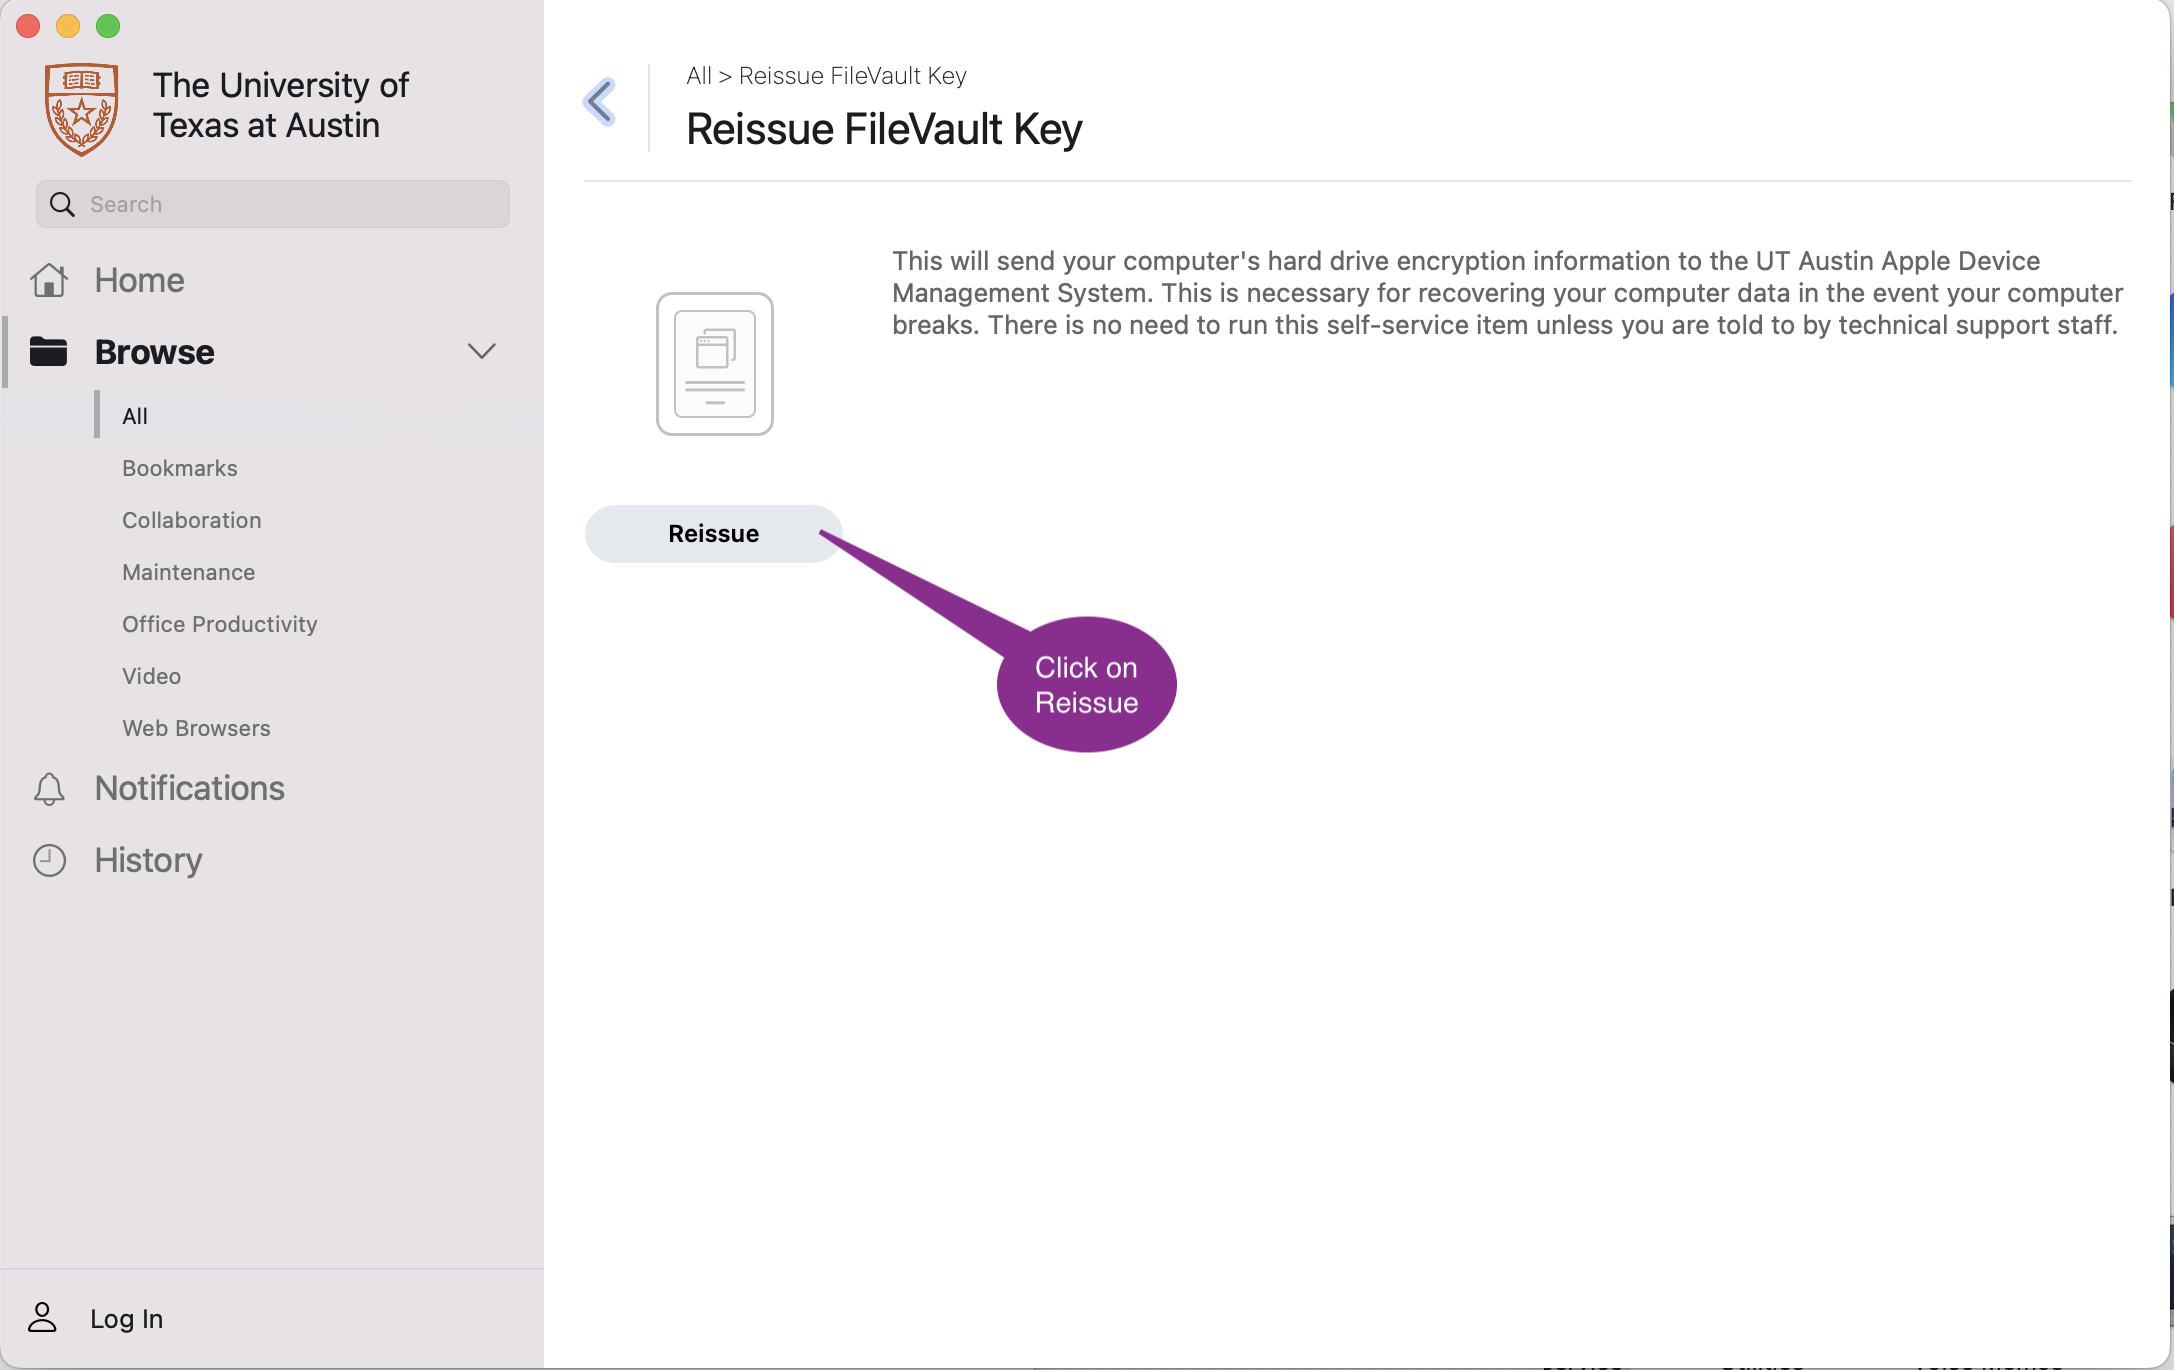
Reissue FileVault Key
Important
This critical step creates a new FileVault key to ensure we have a recovery key to unlock your data in event you forget your password.
Now open the UT Self Service app in your Applications folder and click
on Reissue under Reissue FileVault Key.
A new screen will appear, click on Reissue.
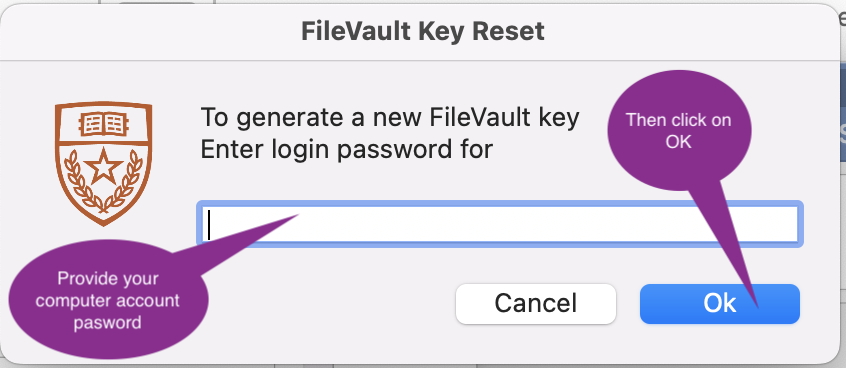
An authorization window will appear to reset the FileVault key. Provide your user account password for this system and click on OK.
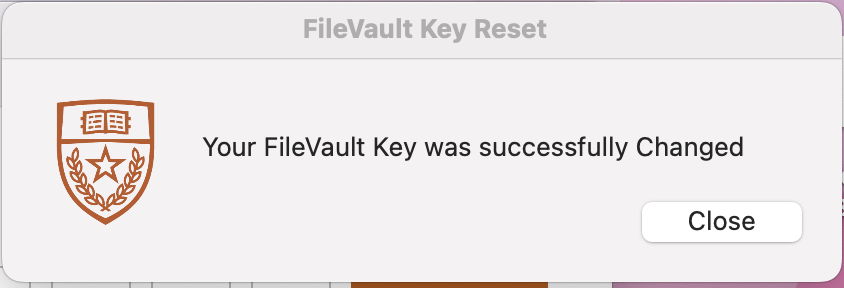
A successful authentication will display the following window below:
You have successfully enrolled your laptop.